
# Git Mode
The Bionic Metrics Platform provides two primary ways of managing test and module files:
- Standard Mode (Default): In this mode, there is one copy of code for tests and modules stored in the platform.
- Git Mode: This mode allows for using a GitHub repository as the storage engine and version control for all test and module files.
In this guide, you will learn about
- Git Mode
- Migrating from Standard Mode to Git Mode
- The differences between Git Mode and traditional file systems
- How to use the platform features in Git Mode
# Prerequisites
# GitHub Flow
If you are not familiar with Git, GitHub, or GitHub Flow we recommend you familiarize yourself with these tools and processes before following this guide.
Git Mode in the Bionic Metrics platform is designed to enable the GitHub Flow that supports teams and projects with many members and where changes are made rapidly to the test and module files.
# Key Concepts
# Gist
At the core of Git Mode is a simple concept: instead of Bionic Metrics storing and retrieving all your files in our platform, they are stored and versioned inside of a GitHub Repository.
This enables teams to work on tests and modules in different branches without colliding with each other. Even if you're not working in a large team, Git Mode enables version control and change tracking on all files so you can easily see how changes affect your tests.
# Filenames and Structure
For the platform to map tests and modules to git files, they all must have a valid filename that acts as a pointer into the git repository. If you are migrating an account with existing tests and modules, use the CLI (see Setup) for an easy way to set filenames on all tests and modules and commit them into a repository.
If a test or module does not have a filename, the system will not have a pointer to the code that exists in git.
# Folder Structure
All files must fall into the following folders:
- test/
- module/
Where test/ holds all test files and module/ holds all module files.
Note: Valid filenames must contain no spaces or special characters for best practice, we recommend using lowerCamelCase for filenames. Examples:
- Tests: someGreatTestFile.js, someOtherTest.js
- Modules: user.js, invitation.js, account.js, anotherModule.js
# Key Differences
There are some key differences between Git Mode in the Bionic Metrics platform and traditional filesystems that are worth highlighting.
- When you work on a test or module, changes are saved automatically. Until you commit those changes they are stored in the system and "staged" much like uncommitted git files in a filesystem. However, since changes are saved automatically to the platform, the logical filesystem can be shared between users. In other words, if two users are working on the same git branch they will see each other's staged updates even before they are committed to the repository - much like a shared filesystem. If this is not desirable, make sure users work on different branches from one another.
- Because the platform needs a way to map test and module files to git, the filenames are important and slightly different than what you may be used to in a typical git filesystem. Namely, in a typical git filesystem, the filenames are encapsulated within the ref or branch whereas in Bionic Metrics the filenames act as a "pointer" or "references" into git. So, in a traditional git filesystem, a file may exist on branch1 but not on branch2 until the changes from branch1 are merged into branch2. Since filenames act as pointers into git for Bionic Metrics, a test may exist but have a blank or nonexistent code backing for the branch being used.
# Example
- A branch dev is created off of master and a file is added to that branch with the full path module/test.js
- The new file is committed and pushed to dev
- If you were to then to switch to (checkout) the master branch you will not see the module/test.js file until the changes from dev are merged into master
- The key difference is that in the Bionic Metrics platform if you are on the master branch you will still see the module/test.js module listed, but the contents of the file on master do not yet exist until dev is merged into master.
If you follow best practices for git and GitHub Flow you should not encounter any issues. Keep in mind that Git is a powerful tool that allows for powerful workflows, but if used without the background knowledge, you can get yourself into a tight spot (i.e. you can compromise the integrity of your git repository).
# The "master" branch
In a typical git repository, the master branch is special in that it contains the "golden copy" of the files in the repository. What this means is that master should always match what is deployed to your production stack. Likewise, the master branch in Bionic Metrics is special as well in that it is intended to match the same "golden copy" of the platform under test. So, if you're using the GitHub Flow your downstream branches are merged up the tree and eventually to master as the platform-under-test undergoes the same merge.
# Setup
Note: If you do not see the menu options in this section, you might not have Git Mode enabled for your account. Email us at support@bionicmetrics.com to have these features enabled for your account.
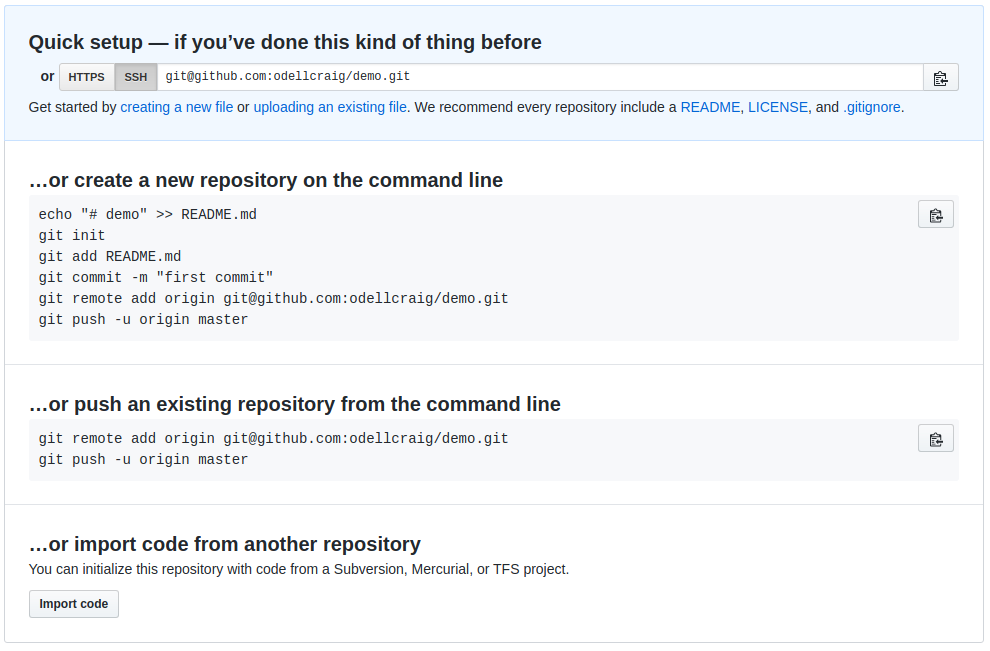
# 1. Create a GitHub Repository
First Create a GitHub repository and follow the steps to clone the empty repository to your local filesystem.
 Note: we recommend using a separate repository from your main codebase as retrieving files when running tests will be faster if the repository is not polluted with unrelated files.
# 2. Migrate Existing Tests and Modules
If you don't have any existing tests/modules you can skip this step.
Download and login to the Bionic Metrics CLI.
From the root of your cloned repository:
> bionic pull all
Follow the prompts until all the tests and modules are pulled from the system into the test/ and module/ directories.
Note: if any tests or modules did not have a filename set, the CLI will set a lowerCamelCase.js filename for you when you pull the file to your local filesystem.
Note: make sure no one is making changes to tests or modules during this process. Any changes to tests/modules after the bionic pull all will be lost.
Now commit those files into your repository and push them to the master branch:
> git commit -am "Initial Commit"
> git push
Check your GitHub repository and make sure your files are all committed and look correct.
# 3. Installing the Bionic Metrics GitHub App
Install the Bionic Metrics GitHub App on your GitHub account. You can limit access to only the repository you created above in the installation process.
# 4. Setting The Repository
Now that you have your repository setup with your tests and modules and the GitHub App installed, you can now point your Bionic Metrics Account to your newly created repository.
Go to Top Right Menu > Integrations
In Integrations, click Set Repository and select the repository you created above.
Check the Git Mode Enabled checkbox and save.
Your account is now pointing to your GitHub repository.
Note: For any other users on your account, make sure they log in/out for this change to take effect.
# Usage
# Creating a New Branch
To create a new branch, click the current git branch in the top right corner of the application and click "Create Branch"
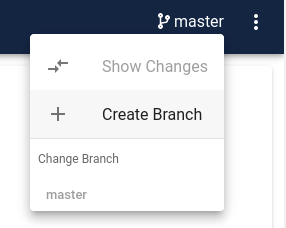
Creating a new branch will automatically switch to the newly created branch.
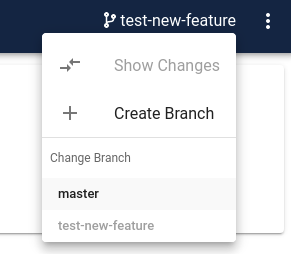
# Switching Branches
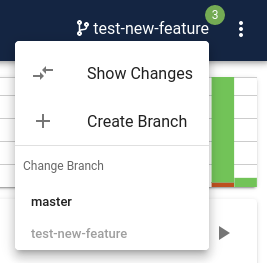
To switch branches click on the name of the branch you would like to switch to from the git menu:
Note: The number of uncommitted changes for the current branch is indicated by the badge count shown on the git branch:

# Running
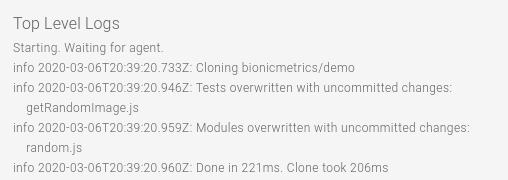
When running a suite, the system will take any files for tests and modules from the git repository configured on the current, active, branch except any uncommitted changes on the active branch.
For example, if you have uncommitted changes on the module user.js and the test testNewFeature.js the system will use your staged/uncommitted changes for user.js and testNewFeature.js and any other files files, that do not have uncommitted changes, it will retrieve the contents from the git repository.
Any files that were overwritten by uncommitted changes for the active branch will be listed in the logs for the test run:
Note: when a suite runs from an Interval or from a Detect the master branch is used.
# Committing a Single File
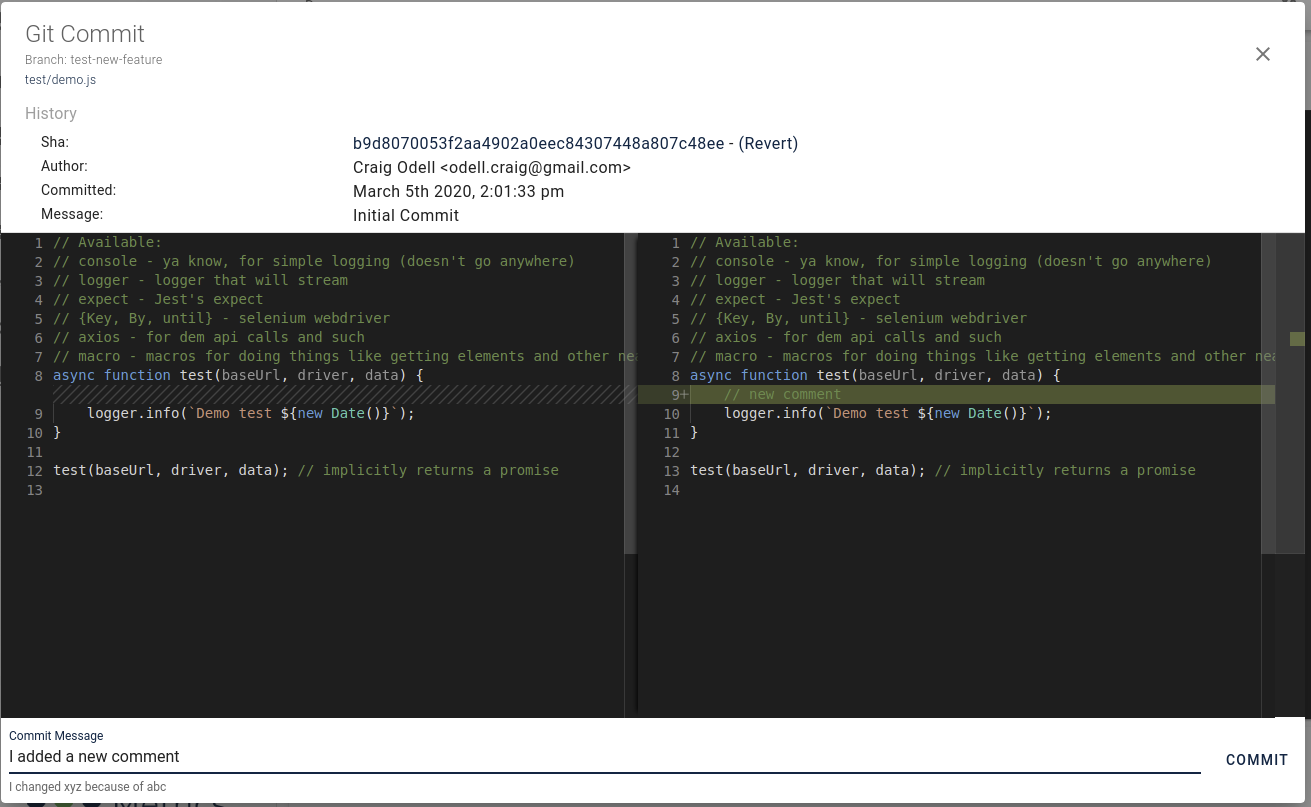
When you're working on a file (a test or module) and you make changes such that the file does not match what is currently committed in git, you will see an indicator in both the top-level badge count and in the git dialog for the current file:

To diff the current file and commit it to the current branch click the button in the top right toolbar:

From the commit dialog you can compare to the current version and commit the changes with a commit message:
# Committing Many Files
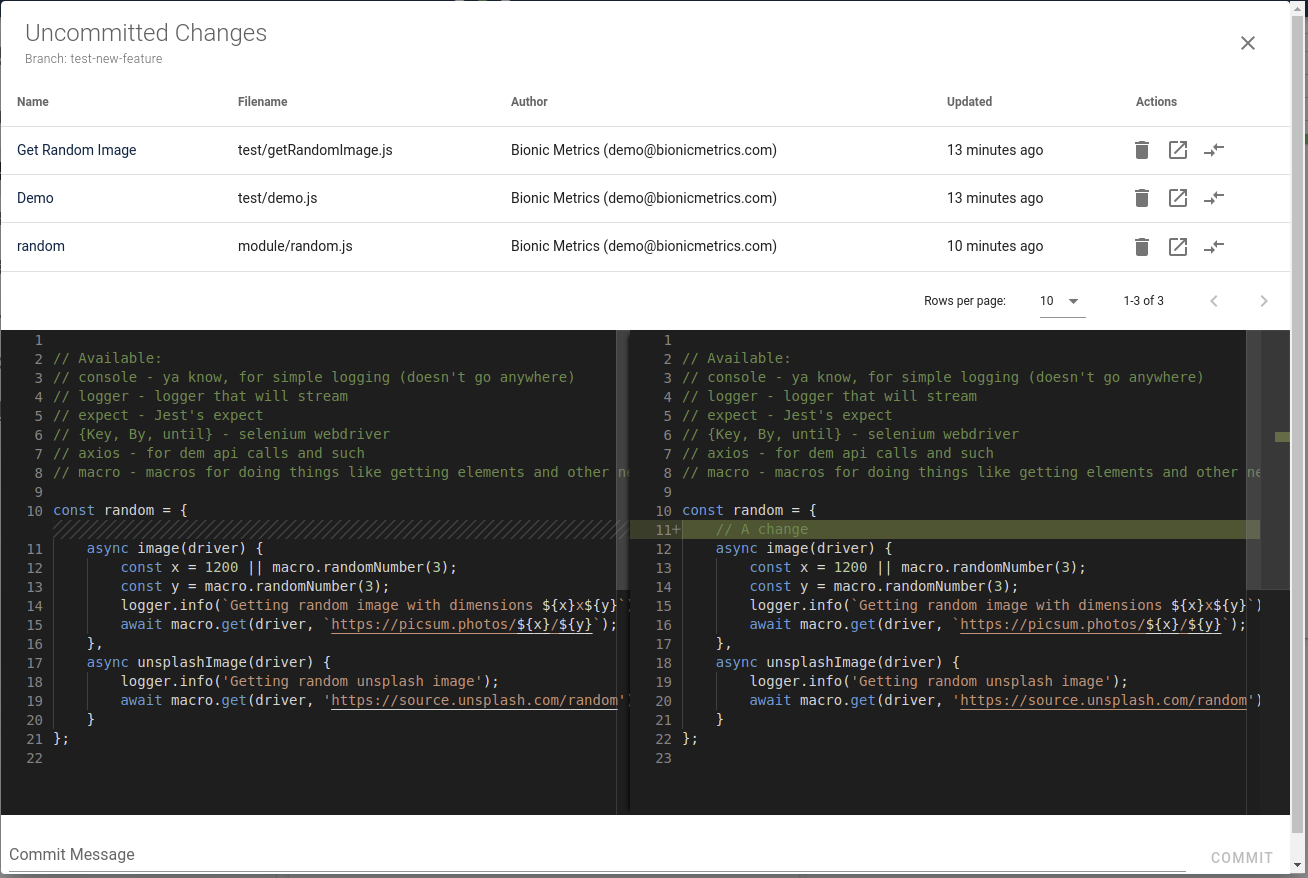
If you are working on many files within a branch the number of files with uncommitted changes will be shown in the badge on the git branch:
To review and commit many files select Show Changes from the git menu:
From the uncommitted changes dialog you can diff files, reject changes, or commit the changes to the active git branch:
Once files are committed to a branch, you can use Git/GitHub to merge changes or create a Pull Request to the upstream branch to follow the GitHub Flow.
# Changing a Filename
When changing the name of a file, be careful that this file is not in use in any other branch. As discussed in the Key Differences section, the filename for a test or module acts as the pointer or reference into the git ecosystem. By changing this pointer you can inadvertently remove the ability for a different branch to access its git content. If you're sure that the file whose name you'd like to change is not in use in any other branch, you can do so by going to the git dialog for that file:
Then clicking on the current filename for that file:


If you have any questions, please contact us on Slack or support@bionicmetrics.com